GEEETECH A10 REVIEW

Introduction
Off the back of
Creality3D’s Ender 3 launch, GeeeTech has produced their version/clone in the A10.
This is a slightly larger and cheaper unit and utilises GeeeTech’s GT2560 RevB
Open Source Controller. The Build area for the Ender 3 comes in at 220 x 220
x 250mm with the A10 being 220 x 220 x 260mm. The other notable difference between the two units is the larger LCD and more powerful PSU in the Ender 3 unit that the A10 lacks.
I always keep an
open mind when I get new products, and as there is little info on this 3D
printer out there I was ready for anything. So let’s start with the all the
Spec stuff then I will get into the guts of this machine.
Geeetech A10
specifications

Technology:
FFF FDM
Launched
in:
2018
Assembly:
Semi-assembled
Mechanical
arrangement: Cartesian-XZ-Head
Manufacturer:
GEEETECH
Manufacturer
country: China
Materials
Printable
materials:
PLA, PETG
Filameter
diameter:
1.75 mm
Compatible with 3rd
party filaments? Yes an open material system
Build volume
Print size
millimeters (xyz): 220
x 220 x 260 mm
Print size inches
(xyz):
8.6 x 8.6 x 10.2 inches

3D Printer and
printing properties
Accuracy:
11 x
11 x 2.5 Microns
Layer
resolution:
100
- 400 Microns
Feeder
system:
Bowden
Extruder
type:
Single
Nozzle
size:
0.4
mm
Max extruder
temperature: 428
°F / 250 °C
Max heated bed
temperature: 212
°F / 100 °C
Frame:
Aluminum
Closed print
chamber:
No, an open structure
Temperature
controlled print chamber: No
Bed
leveling:
Manual
Print bed
details:
Heated bed with adhesive coating
 Display:
LCD
Display:
LCD
Firmware:
Open-source
Board:
Open
source GT2560 board
Connectivity:
SD, USB
Built in
camera:
No
Print
recovery:
Yes
Filament
sensor:
No, but
may fitted later
Requirements
Slicing:
EasyPrint 3D
Operating
system(s): Linux
Operating
system(s): Mac
OS X
Operating
system(s): Windows
Input:
110 - 240V
Output:
24 V DC / 15A
Dimensions and
weight
Outer dimensions
inches
(xyz): 18.82
x 16.26 x 19.09 inches
Outer dimensions
millimeters (xyz): 478 x 413 x 485 mm
Weight
lb:
16.5 pounds
Weight
kg:
7.5 kg
Unboxing
The 3D printer arrived
in an unmarked cardboard box just like all the other 3D printers that I have purchased. From previous experience I was expecting damage to the machine and all of its components
from the postage process.
On opening the box you will find the instruction leaflet and package list. This is to confirm you have all the required parts to build the 3D printer. Note: if you are missing anything, get onto your supplier for whats missing, this has happened to me in the past.
After I went through the box I was pleasantly surprised that there was nothing broken,
scratched, dented and most of all nothing was missing. GeeeTech has done a great job with the packaging, and I was very happy to see that everything had a place and was well protected.
After I removed all the parts I only found one screw at the bottom of the
box that had vibrated loose from the Hot End attachment. Not a huge issue, and easy to fix.
I then proceeded to
do a close inspection of all the parts for damage. Starting with the upper
gantry section. This is where I discovered that the Bowden Tube
entering the top of the Hot End had been snapped or severed.
This is a really
curious place for damage and I can’t see how they would have missed this in the
QC process in the factory or during packaging. All I could come up with is that it was done in transit some how? Maybe rubbing against the packaging and/or vibrated until it broke?
Anyway it’s an easy fix and I intended to repair when I checked the Hot End Assembly. I then proceeded to disassemble the Hot End to check for damage and design
flaws.
The hot end itself is an interesting design, it looks like a Modified E3D design with the Bowden Tube extending right down to the nozzle.
I do these types of inspections to find any damage that may have occurred
during transportation or manufacturing. On this particular machine received,
I
found the wires that go to the cooling fan for the print had been squashed
between the outer case and the rail bracket. I would assume this would have
been done during the manufacturing process and missed in their QC Process.

When I removed the case, the wire was only squashed and not severed so it was still ok to be used, but it’s something I will have to keep an
eye on and look at replacing in the future. I also noted that all the cabling for the Hot End cartage and thermostat is
wrapped up and held in the cover, this is a concern too but will be easy to fix in the
future.
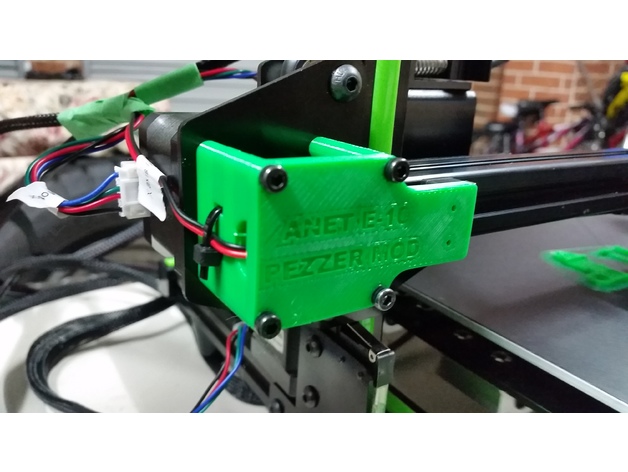
I found that the mounting of
the Hot End cooling fan is strange, I can't see it being very efficient. I will start to design a new cover, something that incorporates the Fang design would be perfect here.
What I also noticed
that this machine had not been used, this means there was no QC print test before
packaging.
Everything else on the upper gantry look good so I moved onto the bottom gantry.
I went right over this part and found nothing that was of concern.
It was great to find that the build platform is one of the best I have seen and really well though out. All the wiring is soldered straight to the board (not through plug that can burn out) and there is
a rigid wire strain relief. But I will look at covering the exposed solder points with
something when I get into Mod mode.
Opening the
controller box, I was happy to see an old friend with replaceable servo AMP’s
and an easy to modify GT2560, but wait this looks to be an upgraded model, yep
Rev B.
Woo Hoo, this means Filament detection and bed leveling will be easy to add.
So, there is a bit
of work to do it this space for upgrades and ‘how to’s’ for firmware mods.
Next on my list the
PSU, I have a lot concerns about this unit as it only has a single output, is only a
15A supply and the XT60 Plug is not a original part and could potentially become a fire hazard (I will keep a really close
eye on this) I feel this will need to be upgraded in the future.
But I found the
construction overall to be sound and all the connections to the PSU where secure.
Everything else checked
out fine and I was ready to put it all together.
Assembly
The instructions
where really basic but so is the machine, (the English conversion on the
instructions are good) and was easy to understand.
Everything fitted
well and as I added a new Bowden tube I had to muck around a bit to get the
wiring on the upright gantry to work well.
Lots of zip ties,
and presto… 20 mins and It’s ready to power up.
Setting up and leveling the build platform was a breeze and took no time at all. I put the SD card into the printer and found only one file on it called A10 DOG, so I pressed
print… Then.....
FAIL!!!!!
The PLA that they supplied is
not the best quality, so I swapped it out for some high quality PLA,
And success.
The build platform
is an Aluminium/Glass/Adhesion layered hot bed. This work really well. But
caution is to be observed here, as you could take this coating off If you are
moving the head around to level it and you run the head into the plate.
User Interface and
Navigation of the LCD Menu
This is an easy to
get around menu and has some interesting features. It lacks some info that I
would like to see but as it’s open source I will upgrade the firmware in the future.
It’s also a shame
they went with a small LCD as well, but like a said before all can be modified for upgrades on
this printer.
Upgrades and
Modifications
This things that I
will look at doing to this Printer is:
- Replace the TX60
plug with a original one.
- Upgrade the 15A PSU
to a 25A PSU.
- Cover the exposed
solder point on the Heat Bed.
- Design and upgrade
the hotend for a Fang setup.
- Add the filament runout
sensor and bed levelling sensor.
- And look at a
bigger LCD with upgraded Firmware.
Final Verdict
7/10
I am impressed with
this Printer. From unboxing to first print I have had no real problems and I can see
myself spending a bit of time on the printer. there is a lot missing from this printer but you pay for what you get and I feel you get a lot with this package.
Build Quality
7/10
The V-Rail construction
is great and the fact that all the axis’s have eccentric spacers for adjustment
is good to see. I also like the fact that only one part was 3D printed and all
the rest where manufactured. This give a better-quality feel about it.
Print Quality
8/10
First Layer
adhesion is excellent, and straight out of the box I got really good quality. I did some small tweaks in my slicer program and got even better results, so it is right up there in the quality department.
PROS
- Easy to assemble,
- Will be easy to
upgrade in the future,
- Good quality print,
- Really well designed Build
Platform, And
- Really Quite, yep I found
this to be a really quiet machine too.
CONS
- No Duel Z lift
setup,
- No external Mosfet for the HeatBed,
- PSU is not going to
last the test of time at 15A, needs to be 25A,
- Hot end needs a bit more attention to detail, And
- A tiny bit more
effort in the QC department would be great.
Conclusion
I really like this machine
now, I feel that it will make a good inclusion to my 3D printer arsenal and with
time I will be able to fine tune this machine for all of my smaller parts that
I print.
I really hope this helps you and please feel free to ask me a question or leave a comment about the GeeeTech A10.
Happy Printing,
PEZZER
Where to Purchase
Click Here > GearBest - Geeetech A10 Quickly Assemble 3D Printer 220 x 220 x 260mm


