Monday, October 8, 2018

GeeeTech A10 Verses PETG

The Challenge

I really want to print in PETG and I think that the GeeeTech A10 printer can handle it, SO i'm putting it to the test..
I have a couple of really good colors in PETG starting with this RED.


The Test Print

So to test it I started with the #3DBenchy after a couple of attempts setting up the print I finally got it and was able to print this.


This came out really good and I am happy with the results. 
My setting where as follows:
Temps:
Nozzle - First layer 240c
            - Print 235c
Bed - 80c at all times
Speeds: 30mm/sec
THE BIG TEST

This then lead to a huge print for a mate, he is building a RAILCORE II 3D Printer and needed me to print the parts for him. I finished the Print Blog here PRINTING A RAILCORE II

He wanted it to be printed with eSun PETG in SOLID BLUE and I was happy with the setup from the red PETG.


The RAILCORE II needs 50+ parts and had the A10 working flat out...


All up it did 200hr, went through 1.2kg of filament, two nozzles and I only had 170grams of waist.


This little printer has been such an impressive machine, all of this was done with no mods to the printer.

Check out my Geetech A10 review @ GeeeTech A10 Review 


If you are interested in purchasing one, 
Click Here > GearBest - Geeetech A10 Quickly Assemble 3D Printer 220 x 220 x 260mm


Tuesday, August 14, 2018

PRINTING A RAILCORE II

UPDATED 08-OCT-2018

RailCore II

A friend of mine has asked if I could help him out and print the parts for a RailCore II - ZL out of PETG, so here is the start of the adventure.

The original files can be found here:
RailCore II - Thingiverse Files
AND:
RailCore II - XL Option Thingiverse
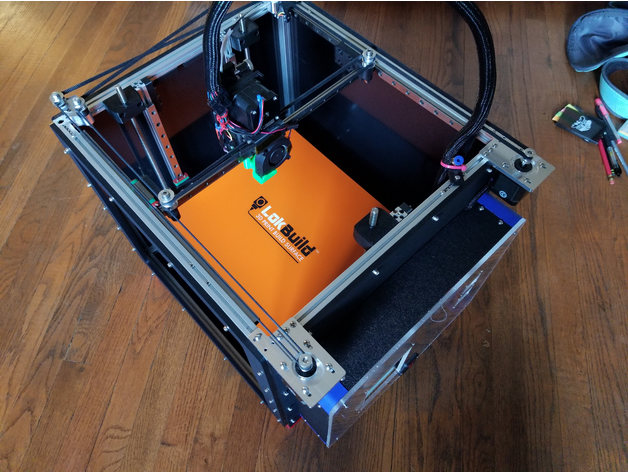
RailCore II - ZL

The choice of Filament is eSun PETG in SOLID BLUE, and it looks amazing..


The big issue was getting the settings right for my GeeeTech A10. It took some time and a small bag of failed prints..


But I finally got it sorted. And I'm getting consistent prints.

Printer Settings:
First Layer:
Temp -Nozzle 240c
          - Bed 80c
Speed - 15mm/sec (to get bed adhesion)

Rest of Print:
Temp -Nozzle 235c
          - Bed 80c
Speed - 35mm/sec


THE PARS PRINT LIST


Name Qty Notes
Z_Bracket_Top 3 3 Completed
Z_Bracket_Bottom 3 3 Completed
Front_Stationary_Idler_Carrier 1 1 Completed
Back_Stationary_Idler_Carrier 1 1 Completed
Idler_Spacer 2 2 Completed
Front_Motor_Mount 1 Printing
Back_Motor_Mount 1 Printing
Back_X_Carriage 1 1 Completed
Front_X_Carriage 1 1 Completed
Belt_Retainer_Clip 4 4 Completed
Y_Carriage 1 1 Completed
E3DV6_Groove_Mount 1 1 Completed
E3DV6_Groove_Mount_Retainer 1 1 Completed
Y_Endstop_Mount 1 1 Completed
X_Endstop_Mount 1 1 Completed
Cooling_Shroud 1 1 Completed
IR_Probe_Mount OR BLTouch_Mount 1 1 Completed
Electronics_Box_Corner 4 4 Completed
Titan_Mount 1 1 Completed
Filament_Guide 1 1 Completed
ZL_Z_Yoke_2 2 2 Completed
ZL_Z_Yoke_1 1 1 Completed
ZL_Foot 4 4 Completed
ZL_Foot_Pad (Optional) 4 4 Completed
Rail_Alignment_Tool 2 2 Completed
X_Carriage_Insert
Bearing_Block
2
4
2
4
Completed
Completed
48 PRINTED
Total 50 2 LEFT TO BE PRINTED


Front and Back Stationary Idler Carrier - 50mins each
Front and Back X Carriage - 1.2Hr each


Z Bracket Top X3 - 1.2Hrs each
Z Bracket Bottom X3 - 1.2Hrs each
BEARING BLOCK X4
I didn't find the Bearing Block in the Printing BOM but I made them as I think they are needed..

X Carriage Insert X2
Belt Retainer Clip X4
Idler Spacer X2
Cooling Shroud 
Y Carriage


ZL Z Yoke 1 and 2

ZL Foot Pad x 4
E3DV6 Groove Mount and Retainer

X and Y Endstop Mounts
Electronics Box Corners

BL Touch Mount
IR Probe Mount
Filament Guide
Titan_Mount 

Rail Alignment Tool 

EXTRA PARTS

Fan Cover

Thumb Wheels
PSU Cover


So for now It's going well and I will keep adding Pic's as I go..

TO BE CONTINUED...................


I'm Printing all of these part on my GeeeTech A10. 


If you are interested in purchasing one, 
Click Here > GearBest - Geeetech A10 Quickly Assemble 3D Printer 220 x 220 x 260mm


Sunday, July 29, 2018

PEZZERS ANET E10 3D PRINTER REVIEW

ANET E10 3D PRINTER

G'day everyone,
In early 2017 I was sent a ANET E10 by GearBest. I was very optimistic about this 3D Printer as I had read a couple of good reviews that where very positive, so I really wanted to see if it lived up to this reputation. 


When I received I wasn't expecting too much in the QC department for build or part quality. And during the un-boxing I was instantly disappointed to find the QC guys at Anet had forgotten to pack the instructions and accessories box... But this didn't hold me back. Anet has the instruction on the WEB and I had enough parts in my shed to get it up and running.

But this wasn't the biggest problem, I inspected all the parts and found a much bigger issue. During the shipping the courier had squashed the box and damaged to the heat bed.

The two point where the bed was rubbing on the printer during it postage.


And again I found that I was able to fix this with a little bit of TLC and soldering. I have always intended to replace this bed but have had no problems so I will keep going until it dies..
After I got the bed fix I was surprised to find this to be a rather good printer. I did around 50hr's of printing without any Mods and had little to no issues.

The only real issue that I had is the X switch location and the Y switch position.
The X stop switch was being hit by the GT2 Belt
Here are the two Mods I designed:


And after a little Modification it's now a really reliable 3D Printer that I have become to love. I added the following Mods to get it to where it is now:


Here is a link to my Mods pages: Anet E-10 Upgrades and Mods

And check out the Anet E10 Thingiverse Group @ ANET E10 USER GROUP

So after all of this I have now got this 3D Printer to a state that I can really rely on it and get amazing results.


A small collection of my prints.
Mounted to My desk at work, flat out printing!!!


I have had over 500 hrs of printing and I love this machine, I am currently building an enclosure so I can print 24hrs a day and be able to monitor it from a far.. 

If you wish to purchase the Anet E10 from GearBest @ ANET E10 3D PRINTER

Also check out the Anet E10 Thingiverse Group @ https://www.thingiverse.com/groups/anete10